Wednesday, April 6, 2011

Coach of the Year

My son's wrestling coach was recently honored as the "Coach of the Year" in our conference.  To thank him for all he does, I "whipped up" a framed copy of the newspaper article, a quality picture of him at the banquet and a picture of the trophy he received.


Congratulations Coach!

Tuesday, April 5, 2011

Cooking With Cricut Blog Candy

Congratulations to the Cooking With Cricut blog for reaching 1600 followers!  They are having a FABULOUS giveaway to celebrate.  Head over and check them out.  You have until April 16 to enter.

Saturday, April 2, 2011

TinkerBell Card and Scrapbook Pages

Today is my niece's third birthday (Happy Birthday Sweetie!).  The party is tomorrow, so I've been busy creating not only a card for her gift, but a two-page scrapbook layout for her mom to capture tomorrow's party.  I'm going to apologize in advance for the poor photography.  Winter seems to be hanging around here and with it the poor light.

She is having a TinkerBell cake for her party tomorrow, so I stuck with the theme for both her card and the layout.  I was VERY tempted to go out and purchase the TinkerBell cricut cartridge, but commonsense took over.  It really isn't a cartridge I would use enough to justify the cost; my daughter's too old, and I only have one niece.  I happened to come across a TinkerBell scrapbooking page kit at Hobby Lobby and decided it had enough stickers and paper to create both a card and matching layouts (and I decorated a plain green gift bag) and it didn't cost me nearly as much (and it was on sale).

Card front (sticker says Perfectly Precious)

Card Inside
Envelope
Two-page layout (white place markers for my sister-in-law to add photos)
Close-up left page

Close-up right page

Supplies used:
  • Paper and stickers from Disney Fairies Theme Pack by Sandylion
  • TinkerBell Stickers by Sandylion
  • Gypsy inkpad from Close To My Heart (Z2190)
  • Lime Green Stickles by Ranger
  • "3" cut from Cuttin' Up cricut cartridge cut at 4"
  • All other words cut from Mickey Font cricut cartridge (who is cut at 1", look cut at .66" and negative image used)
  • Layout was based on the Supporting Cast layout from the Imagine book by Jeanette Lynton

Monday, February 14, 2011

Cheesy Valentine

Okay, inspiration can come from anywhere.  Looking through a cooking magazine one day, I saw an ad that sparked my creativity and knew right away what my daughter's Valentine was going to be.  Here's the ad that caught my eye:
Reiman Publications, Taste of Home, Feb/March 2011, page 11

Like many kids, my daughter would have cheese on her cheese for every meal of the day.  The card sentiment was great, but I knew I could use it much more creatively.  Here's my take:

I attached that cute little mouse with foam tape.  I used my Gypsy to hide one of the holes in the swiss cheese.  I then welded a heart in the spot where the hole had been.

In addition to cheese, she loves sparkles.  Stickles were a definite must-have for the hearts on the inside.
Details:
  • Cheese (Create a Critter accessory and shift/accessory) cut at 4"
  • Heart (Create a Critter shift/accessory) cut at 3.71"
  • Mouse (Create a Critter mouse, shadow, layer 1, layer 2, layer 3) cut at 2"
  • Phrase (Create a Critter phrase and shift/phrase) cut at 2"
  • More Than (Cursive 101 welded together) cut at 1"
  • Cheese (Create a Critter phrase placed off the mat and trimmed to delete "say") cut at 6.5" wide
  • Stone Gray Staz On ink
  • Magenta Stickles
  • Cardstock & ribbon from scraps
Have a wonderful evening!  Be back soon with another project.

Hoppy Valentine's Day

My son LOVES frogs.  He has frogs sitting all around the house - bobbleheads, stone statues, big, small.  What better than a frog Valentine for my "frog boy"?

Pinks and purples are not colors my teenage son loves, so I chanced looking "Christmasy" and used red and green on his Valentine.

I attached the frog with foam tape to give him some dimension.

The inside was printed on the computer and then cut to fit.

Okay, here's the details on this card:
  • Frog and layers (Paisley cartridge) cut at 3"
  • Lilypad (Create a Critter) cut at 3"
  • Cuttlebug Heart Blocks embossing folder
  • Stampin' Up ribbon
  • Xmas Red Stickles
  • Inkssentials opaque white pen
  • Lime green chalk Cat's Eye inkpad
I have one more Valentine to share with you.  I have to find the magazine that my inspiration for it came from to share with you before I can post.  Hopefully I'll have it up yet today.

Hope you have a wonderful Valentine's Day!

Sunday, February 13, 2011

Valentine Mail Box

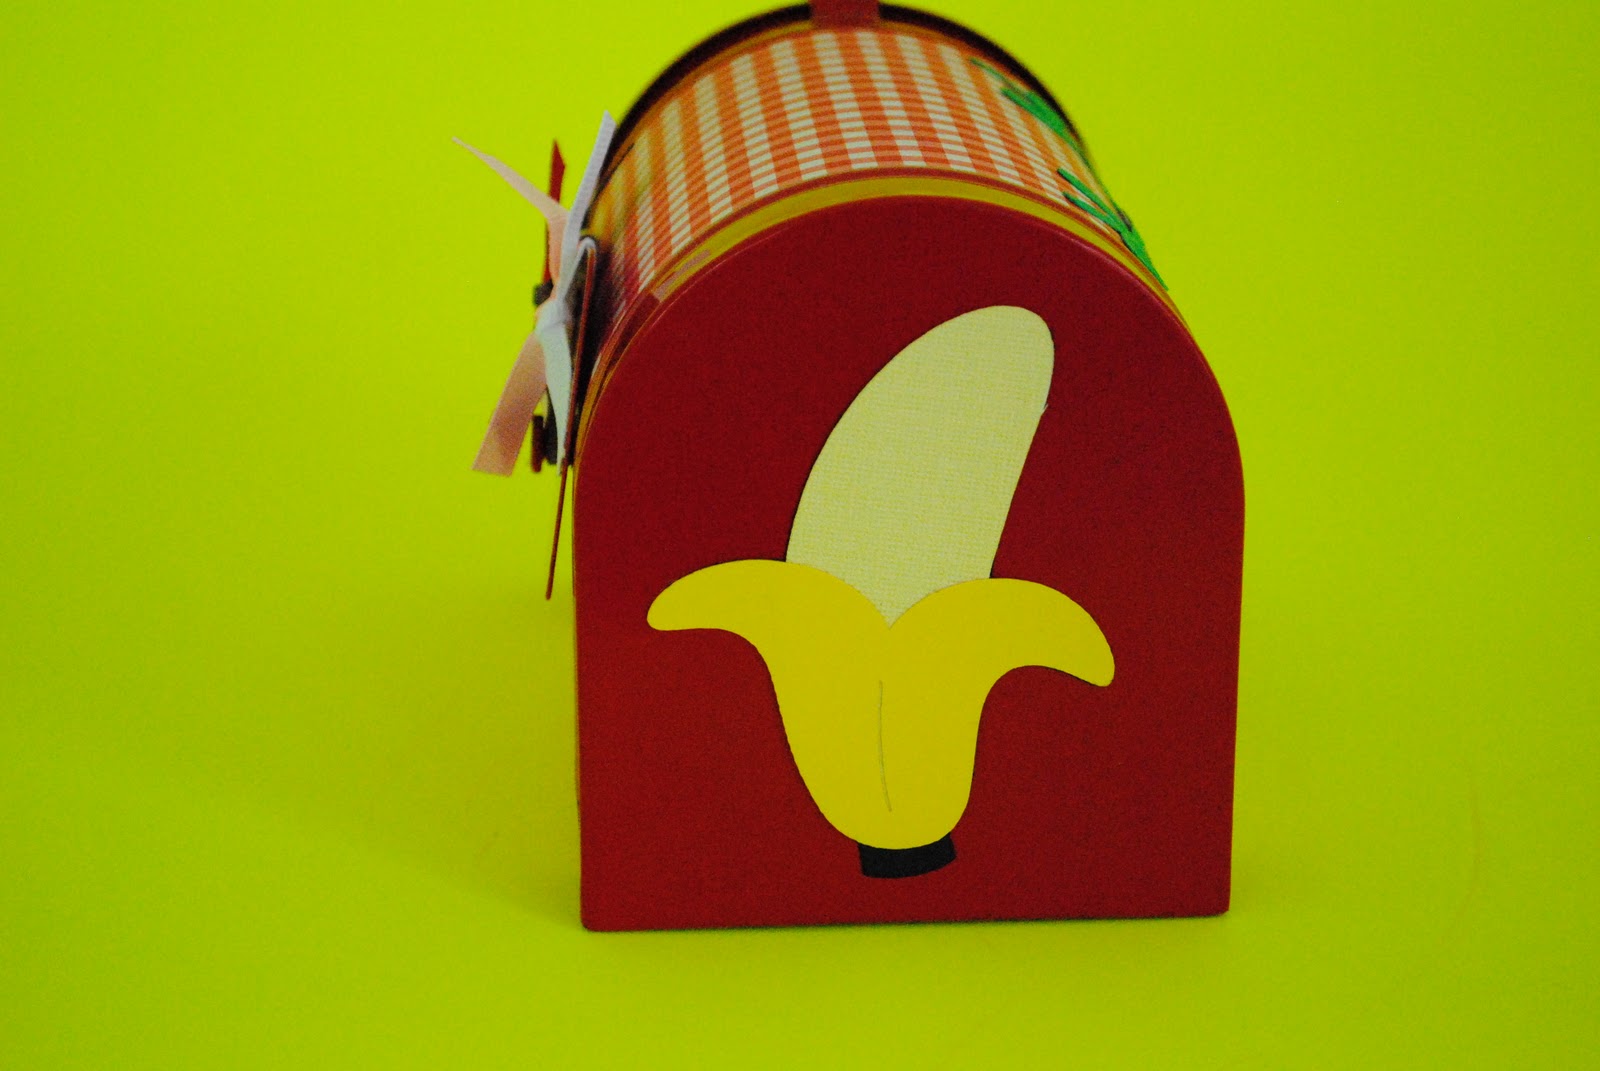
Hey everyone!  Here's a mailbox I made today for my niece for Valentine's Day.  She's not allowed to have a lot of candy, so I stuffed it with a few pieces of candy along with some Valentine barrettes, Valentine rubber ducks, and a jingly heart necklace.

I was able to use paper from my scrap stash to complete the entire project.  Everything was cut on the Cricut from the Create a Critter cartridge.  The ribbon tied to the mailbox flag is from Stampin' Up.

Front
Back
I just love this little monkey.  I wish I had some flocking at home to make him fuzzy, but it's probably just as well, since my niece is only two.

The cuts on the mailbox are:
  • Monkey, layer 1 & layer 2 - cut at 3"
  • Banana (shift monkey), layer 1 & layer 2 - cut at 3"
  • Vine (shift accessory) - cut at 3.75" wide
  • Balloon (shift koala), layer 1 & layer 3 - cut at 2.5"
I used my Gypsy to layout the pieces I needed to cut as well as to hide the faces that were on the balloon and bananas.  Using the mat guide on the Gypsy, I was able to cut everything at once by putting different papers on the mat.  Super easy project!

Hope you enjoyed.  I'm off to do laundry and then back to the crafting table for a few more projects today.  I'll be back to share them this week.

Sunday, February 6, 2011

100 Wins Candy Jar

My son had his 100th high school career win this weekend.  I decided it was too big an event to go by unnoticed, so I made him this:
...filled with exactly 100 pieces of candy.
Everything was cut on the Cricut, and I tied ribbon on the hinges on the back.  Here are the cuts I used:
  • 100 Wins cut using Varsity Letter and the shift feature at 1-1/2 inches.
  • The wrestlers were two borders cuts on Sports Mania at 10 inches wide using black vinyl.
  • The Superman logo was cut at 2-1/2 inches from the Superman cartridge.
  • Congrats was cut at 2-1/2 inches from Gypsy Wanderings.
  • The circle on the top was cut at 2 inches wide from Mini Monograms, so that I could add the date of his 100th win (didn't want to jinx anything in case it didn't happen when expected, so I dated it after I took the photos).
  • I attached everything using Liquid Glass from Close to My Heart because it holds so well and dries quickly.
Of course, with the biggest part of wrestling season upon us - conference, sectionals, districts, and states - I had to take the candy jar back until after the season.  My name would be mud if he ended up not making weight at this point in the season.

Encouragement Card

This has to be one of the hardest cards I've needed to make in awhile.  My Girl Scout troop is part of a very large service unit (school district).  We have over 1300 girls involved in scouting in our district.  We were recently asked to have our girls make cards for a first grade Brownie who has been diagnosed with neuroblastoma cancer and is undergoing treatment.  We're hoping to send enough well wishes her way to help keep her spirits up as she begins this journey.

Finding the right sentiment was difficult.  I didn't want a sympathy card, but the traditional "get well" didn't seem appropriate either.  After a lot of thought, this is what I came up with.
I attached the wagon with foam tape for dimension.  I also added "shine" to the words 'pulling' and 'you' with Liquid Glass from Close To My Heart.
Finally, the envelope.
The recipe for this card:
  • Just Because Cards Cricut cartridge - all card images cut at 7".
  • Close To My Heart Whoops-A-Daisy Level 2 Paper Pack (retired)
  • Close To My Heart Hydrangea inkpad (retired color)
  • Close To My Heart Liquid Glass (which also makes a GREAT adhesive for those hard to attach items)
  • Close To My Heart Just Blooms Summer Posies (retired)
  • MyMoments Fashion Pearls by Offray
Finally, the card my daughter made:
Have a great day!  Be back again with another project soon.

Friday, January 28, 2011

Apron Giveaway

Lena over at Lena's Crafts is giving away this adorable apron just in time for Valentine's Day.

Check out her blog for your chance to win.  The drawing will be February 6.

Birthday Card

Remember this envelope from a couple days ago?  I finally got the rest of the card completed and ready to share with you - just in time for my sister-in-law's birthday today.  Happy Birthday Erin!

I think that sometimes we are our own worst critics.  I really wasn't happy with this card when I completed it, but it is starting to grow on me.  In hindsight, I think I would have switch the solid yellow paper with the larger flower patterned paper.


This is a 5.5-inch square card.  The yellow square is 5.25-inches.  The next two layers are the tag and tag shadow from the cupcake button on Gypsy Wanderings cut at 5-inches.  The cupcake and shadow were cut just slightly smaller than 2.5-inches; I was simply trying to make it cover the cupcake outline in the tag, so I was resizing it with the Gypsy.

All paper for this project came from The Sorbet Stack by DCWV.  The edges of the cupcake were inked with jet black StazOn ink.  The frame and yellow square were inked with pastel pink Cat's Eye chalk ink.  I added dimension by using foam tape to attach the frame as well as the cupcake.

And, finally, the inside...There is another 5.25-inch square that is inked in black. with the Happy Birthday phrase and shadow  cut at 2-inches (I think).


So, there's my card.  It's the first I've created in awhile and definitely the first I've used my Gypsy to design. 

This card is being entered in My Pink Stamper's birthday challenge and the Craft Your Passion challenge #42 to use two patterned papers.

Hope you have a great crafty day!

Wednesday, January 26, 2011

Sneak Peak

I got started on my next project this evening.  I'm so excited; I designed/planned it completely on the Gypsy! 

This is (obviously, I hope) the envelope.  I'm not thrilled with the way the shadow and cut lined up, so I may have to tweak it a little.  I think my problem may have been making it "fit to width", but I'm not sure.

I'll be back later this week with the matching card.  

Tuesday, January 25, 2011

Speedy Recovery Card and Gift

First of all, let me say THANK YOU to everyone for their suggestions over the last few days.  It was just what I was looking for...suggestions to jumpstart my creative juices.  I combined several responses I got both here on my blog and from the Cricut messageboard as well.  If you want the background story on this card, see my post HERE from January 23.

I just threw this card together, because I didn't get home until late last night and I wanted to get this to him.  I probably could have "done more" with it, but, for a teenage boy, it will do.

 
  • All of the paper came from my "scrap drawer", so I can't tell you who the paper is by. 
  • The words are cut on the Cricut using the Cuttin' Up cartridge at 1-inch. 
  • The card front words are the cartoon shadow feature and the inside words are cartoon.
  • The cookie, layer 1 and shadow were cut using Sesame Street and Friends at 3.75-inches.
  • I wasn't happy with the coloring of the top layer of the cookie, so I used a sponge dauber and a Chocolate Close To My Heart inkpad to shade it a little.
And, here's what he's getting with the card....
Cookies and cream muscle milk, a package of straws and vasoline intensive care lip therapy.


Thanks for stopping by to see what I've been up to.  Hopefully I'll have some more "creating time" this evening and be back again this week with another project.  Have a great day!

Sunday, January 23, 2011

Need Some Help, Please

I am in need of some help...

At my son's wrestling tournament yesterday, one of his fellow wrestlers had a REALLY rough day. He got poked in the eye during his first match, and then thought he broke his jaw during the same match. Bless his heart, he wanted to continue wrestling the rest of his matches (his Dad's an EMT & present, so who were we to judge?). As the day went on, he continued to become more pale and complain of the pain in his face.

During his 4th match of the day, the coach "threw in the towel" and wouldn't let him continue. His parents wanted to leave right then to get him checked, but he convinced them to let him stay for his final match to "take a forfeit", so the team would get the points (no actual wrestling involved).

He ended up 4-1 on the day - his only loss being the match his coach made him quit. He went to the local ER to get checked and then was referred to the closest Children's Hospital. He does have a broken jaw & a scratched cornea (from the poke in the eye). They don't think they will have to wire his mouth shut, because it was a clean break & open fracture. They are giving him massive antibiotics as well as antibiotic eye drops. Now they are just waiting to see the specialist to see what he says.

Now, my question...
What can I make as a "get well soon" kind of gift. I know when my son had a really rough tournament, I made him a "That Sucks" sucker bouquet. My guess is that he won't be able to eat anything like a sucker even if his mouth isn't wired shut. He is so bummed that his season might be over.

Do any of you creative lurkers have any suggestions? Any help or ideas to help "springboard" my creative juices would be much appreciated.

Blog Candy from Skittles and Scrapbooks by Liz

Liz is celebrating her blog makeover at Skittles and Scrapbooks by Liz, and we're getting the presents!  She has three different prizes she's giving away (and one of them is a Cricut cartridge).

You have until January 31 to enter her drawing.  Click HERE to check out how to enter.

Skittles and Scrapbooks by Liz

Wednesday, January 19, 2011

Superfish

My son has really "clicked" with his new wrestling teammates.  He has started a running joke among them, and many of them now call him Superfish ~ it's a long story.  Anyway, for Christmas, my son received a black t-shirt with a blue Superman logo on the front of it.  The first thing out of his mouth was that he wanted to put Superfish on the back of it.

The blue logo on the front was not one that I thought I would be able to match with iron-on letters, so acrylic paint and my Cricut to the rescue.

I cut the "superfish" word at 1.5" from the shadow feature of Plantin Schoolbook font onto vinyl.  I put the vinyl onto the shirt to use as a template.  I used acrylic paint and covered it very lightly to "seal the edges" so paint didn't seep underneath.  Once that was dry, I gave it two more coats of paint.  Once they were all dry, I set it with the iron.

Voila!  Simple.  And one happy teenager.

Tuesday, January 18, 2011

Core'dinations Paper

I LOVE Core'dinations Paper!  You get such unique results from embossing and sanding it.  Right now, Core'dinations is giving away 50 new, unreleased Core Impressions packs!  Some of it is even embossed already - just sand for a unique look!  Click here to check out the new paper.  I can't wait to get my hands on some of this paper.
The contest runs through January 21, so hurry!

Love Ribbon?

If you are a ribbon lover, you've got to check out Really Reasonable Ribbon's blogoversary giveaway.  Entry ends Wednesday, January 26.  Check them out soon!

Monday, January 17, 2011

Wrestling Banners

The "wrestling moms" got together at the beginning of the season to "do some decorating" for the boys on both the middle and high school teams. In the cafeteria of each school, we hung a singlet for each wrestler with their name and weight class on it.

One of the moms made a singlet template and then we used the Cricut for the names, numbers and wrestlers. The wrestlers came from the Sports Mania cartridge, and I can't remember which font we used for the letters and numbers.

Saturday, January 15, 2011

Halloween

For Halloween, my daughter wanted to be The Mad Hatter - you know the "Johnny Depp" one, not the cartoon one. I was going to buy her a costume since life has been hectic since the move, but she guilted me into making it - "You always make my costumes." I could have probably convinced her to buy one, but then I realized that soon (all too soon, I'm afraid), she won't want me to do these things for her.

So, off to the store we went. I made the jacket and pants and we accessorized with some items (including the hat) purchased from a costume store to bring the "authentic" feel to the costume.

Thursday, January 13, 2011

Sparkles!!


What girl doesn't love sparkles??? I made this hoodie for my daughter using Swarovski hot fix rhinestones. I think it turned out pretty good for my first try. I can't wait to do some more sparkling!

I created this using Hot Fix Transfer Paper and an iron rather than a Bejeweler. Because I was jeweling such a large area, this seemed like a much easier application this time.

I purchased my rhinestones from the Crystal Rhinestone Boutique. Shipping was super-fast, the prices were great, AND they have easy to follow instructions on their website.

LinkWithin

Related Posts with Thumbnails