

Thursday, July 21, 2011
Blog Candy from Joanne
Joanne from TropicLuv, Cards In Paradise is giving away some fabulous candy & it's for a good cause. She is on the Design Team at The Lime Light which makes cards for charitable organizations.
 Visit Joanne and The Lime Light to check out all the details.


Friday, July 1, 2011
Bulletin Board Renovation
The bulletin board at my daughter's dance studio was in serious need of a makeover. It had had the same paper covering it for years and kids had come through and used the pushpins to poke holes in everything in sight.
I thought that covering it in material would make it more durable, so I asked the office if I could "redo" the bulletin board while I waited on my daughter. It's not perfect, but it is a definite improvement over what was there.
![]() It cost less than $10 for supplies and the only tools I needed were scissors and a staple gun. Easy-peasy!
It cost less than $10 for supplies and the only tools I needed were scissors and a staple gun. Easy-peasy!
I thought that covering it in material would make it more durable, so I asked the office if I could "redo" the bulletin board while I waited on my daughter. It's not perfect, but it is a definite improvement over what was there.

Wednesday, June 29, 2011
Dance Team Gifts (Lots of Pictures!)
My daughter's dance team is preparing for Nationals in Orlando, FL. I wanted to make something special for all the girls on her teams. They have worked so hard this year and accomplished so much.
![]()
![]()
![]()
![]()
![]()
![]()
![]()
![]() The Mickey head was cut using the Mickey Font Cricut cartridge and I welded DMA inside it (Dance Masters of America). The stamp doesn't show well in the photo, but it is a custom stamp I had made with K-E Kreations and my e-mail address on it.
The Mickey head was cut using the Mickey Font Cricut cartridge and I welded DMA inside it (Dance Masters of America). The stamp doesn't show well in the photo, but it is a custom stamp I had made with K-E Kreations and my e-mail address on it.
Here is the inside of the book unfolded:
![]()
![]()

After much debating, I decided to make memory books for each girl (18 of them!!) that they can then add their own journaling, photos, and momentos to. I'm really pleased with how they turned out and the girls LOVED them! The really didn't take long to make; the longest part of the process was inking the edges and around the perimeter of each page.

The front cover of each girl's book was personalized with her last initial with her first name cut out of it (welded with the Gypsy) - cut with the Mickey Font Cricut cartridge. "Orlando" was cut using the same cartridge and the "ticket end caps". The tag is also on the cartridge; I used the Gypsy to hide the inside cut and leave it whole and welded the year on the inside.


Here is the inside of the book unfolded:

And, here is the flip side...

There are a ton of supplies used on this one, so I will try to put them in by page order. If you have any questions about what I used anything for, drop me a comment.
- 6x6 My Creations Memory Showcase from Close To My Heart
- Fanfare Level 2 Paper from Close To My Heart
- Cricut Mickey Font Cartridge
- Cranberry Ink Pad from Close To My Heart
- Pacifica Ink Pad from Close To My Heart
- Sky Ink Pad from Close To My Heart
- Just Blooms White Daisy Variety Pack from Close To My Heart (these were inked)
- Stickles in a variety of colors
- Sheer Shimmer Spritz by Tsukineko
- Fanfare Level 2 Brad Assortment from Close To My Heart
- Cranberry Grosgrain Ribbon from Close To My Heart
- Dancing Dreams stamp set from Close To My Heart
- Brads Red Assortment from Close To My Heart
- Brads Blue Assortment from Close To My Heart
- Star Power stamp set from Close To My Heart
As I said, the girls were thrilled with the books. I worked on them the last few weeks for several hours a day as I waited on my daughter to finish dance classes, so they had seen me working but didn't know what I was up to. I didn't want to make anything too elaborate so that they could be personalized by the girls easily or just simply have photos added (and they are mostly 12- and 13-year old girls with their own individual styles). Each one was unique; they had slight variations in which color brads, how the cover was laid out and how some of the patterned paper looked when cut.
Enjoy!!
Tuesday, June 28, 2011
A Little Late....Father's Day
I first and foremost have to apologize for the lateness of this post. The cord on my laptop has a broken connection and my laptop battery died. I could play with it enough to get a few minutes out of my computer, but it has finally given up completely. I had to break down and finally order a new one.
![]()
![]()
![]()
So, here we are, a bit late, but still crafting.


Supplies used:
- Cardstock from DCWV's The Guy Stack
- Wonderful Friend stamp set from Close To My Heart
- Cocoa Ink Pad from Close To My Heart
- Natural Hemp from Close To My Heart
Monday, June 13, 2011
Flag Cake Recipe to Honor Troops
 |
| Photo by Taste of Home |
Help support our troop by viewing the recipe for this flag cake. For each unique view of the recipe through July 4, Taste of Home will donate 10 cents to the USO. Every dime raised will allow a service member to call home for 2 minutes. Show your support today, view the recipe to help out.
Tuesday, June 7, 2011
Blog Candy
Debbie at DD's Crafts is trying to reach 1000 followers. When she does, she is giving away the Wild Card Cricut cartridge.

I just came across her blog while hopping today. She has some great crafting ideas on there. Stop by to check her out.
The link to her giveaway is HERE. Have fun!
Sunday, June 5, 2011
Baby Blanket for Beautiful Cooper
My daughter's dance teacher recently had a beautiful baby boy. My daughter adores her teacher (she has taken classes off and on from her for 8 years), so I decided to make this blanket for her as a gift. Luckily she knew very early that she was expecting a boy, but I had purchased the same yarn in pinks just in case I found out otherwise.
 The photo above is actually the blanket folded into fourths. The darker border continues around all four edges of the blanket. The photo below shows some of the pattern detail.


Thanks for checking out what I've been up to. I'll be back soon with another project.
Friday, June 3, 2011
Graduation Card
I wanted to share with you today a card I made for a friend's daughter who recently graduated high school. All of the papers were from my scrap stash.
 The card is 5x7. The graduations cap is cut from the Wild Card cricut cartridge at 4.5" wide. I traced the cut edge of the cap with a silver pen to make the front edge more visible. The "congratulations" is cut from Wild Card at 4.75" wide. The frame is cut from Accent Essentials at 4.875" wide. I used both the inside and outside of the frame. The frame itself was glued to the card, and I inked the edges of the inside cut from the frame and attached it with foam tape to make it pop.


On the inside of the card, I simply put some of the paper that was used on the front so that I could handwrite a sentiment. The sentiment I wrote before adding my own personal note was: "Don't live down to expectations. Go out there and do something remarkable."
Here are a few close-ups of some of the details:


I cut congratulations twice - once in white and once in black. I lightly inked the white copy and offset it from the black. I also added a little sparkle with some Sheer Shimmer Spritz. The tassle was made with embroidery floss and attached with a shimmery brad.
The supplies used on this card:
- You Rock paper pack from Close To My Heart (discontinued)
- White and black cardstock
- Zebra Flocked Cardstock from The Paper Studio
- Outdoor Denim inkpad from Close To My Heart
- Goldrush inkpad from Close To My Heart
- Spare Parts clip from The Paper Studio
- Spare Parts black flower brad assortment from The Paper Studio
- Silver Pen
- Sheer Shimmer Spritz in Sparkle by Tsukineko
- Embroidery Floss
Thanks for stopping by today. Hope you have a great, crafty day!
Wednesday, June 1, 2011
Ever Wanted to Try Digital Scrapbooking???

If you've ever wanted to try digital scrapbooking, now is the perfect time. During the month of June, Close To My Heart is giving away one FREE Studio J jpg file - no purchase necessary.
All you need to do is visit the Studio J site, which you can find HERE, create an account if you don't have one already, and create away. After you create your two-page layout, you will be prompted through the checkout process and will be able to order your JPG file. You will then receive an e-mail letting you know your layout is ready to be downloaded. It's that simple!
Your JPG file will include three files - a high-res file of the right page, a high-res file of the left page, and a thumbnail image of the entire layout.
This offer is good through June 30. Only one free JPG per account. Try it out today!
Tuesday, May 31, 2011
Baby Blanket with some Sparkle

I wanted to share with everyone a baby blanket that I recently completed. This blanket was knit for my cousin's new daughter, and, at her request, NO PINK. This is her second daughter, and she wanted to know which "special momentos" from childhood belonged to which daughter and everything from her firstborn was pink.
This blanket was actually quite quick to knit as it was knit holding two strands of yarn together. I used a sparkly white and sparkly lavender. It really turned out quite beautiful. If you look closely in the picture below, you can see some of the shimmer in the blanket.

Monday, May 30, 2011

Saturday, May 28, 2011
British Fascinator
It's the most, wonderful time of the year! That's right...school report time. It seems like the last month of school is packed with one project after another.


My daughter recently had an International Fair project. They each had a different country, had to do a report, make a display, present it to the class, and then present again during an open house for the parents. During this "showcase", they could earn extra credit on their project for bringing food from their selected country and by dressing up in traditional clothes.
My daughter had England as her country, and as luck would have it, England has been "on display" because of the royal wedding. Fascinators (hairpieces rather than the traditional hats) have been making a comeback in England, so she had to have one. Mom to the rescue!

Almost all of my supplies were purchased in the wedding department at Hobby Lobby. The green flowery/feathery center was actually a hairpiece/pin that I attached to a headband. The crystals were already on wires and the ribbon was looped around. It was all put together with a hot-glue gun in less than an hour.
Other than her saying that the feathers and ribbons tickled her, she adored it and asked for more in different colors. That's a pretty big complement coming from a "tween" (in fact several of her friends asked if we could make some more).
Thursday, May 26, 2011
Only 5 Days Left...
...to get Close To My Heart's You & Me scrapbooking kit.
This is an amazing kit. It can be used to create two beautiful two-page layouts! It can be purchased for $34.95 or with a $50 minimum order it is yours for only $15.
This kit contains:
You can purchase this kit through your CTMH sales consultant through May 31. If you don't have a consultant, I would be happy to help you out. You can contact me by e-mail or can shop directly by clicking the "Shop With Me" link in the right column.
This is an amazing kit. It can be used to create two beautiful two-page layouts! It can be purchased for $34.95 or with a $50 minimum order it is yours for only $15.
This kit contains:
- 1 - My Acrylix You & Me Stamp Set
- 1 - 12" x 12" Colonial White Cardstock
- 6 - 12" x 12" B&T Duos Papers (cardstock-weight)
- 1 - 6" x 9" You & Me Irresistibles Chipboard Die-Cut Sheet
- 1 Yard - Chocolate Stripe Ribbon
- 1 Package - Opaques Mocha Adhesive Gems
- 1 - Instruction Guide
You can purchase this kit through your CTMH sales consultant through May 31. If you don't have a consultant, I would be happy to help you out. You can contact me by e-mail or can shop directly by clicking the "Shop With Me" link in the right column.
Thursday, May 5, 2011
Penny Pincher Tip
I received this in my Taste of Home e-mail newsletter today & thought I'd share. There are some wonderful tips I'd never thought of. Good thing other people think outside the box.
25 Ways to Use Coffee Filters
Wonderfully cheap, readily available in a couple of sizes, these little paper gems can be used in a variety of ways:
1. Cover bowls or dishes when cooking in the microwave to prevent splatter.
2. Clean windows, mirrors, chrome…they are lint-free and leave glass sparkling.
3. Protect good china by separating your good dishes with a coffee filter between each dish.
4. Filter broken cork from a wine bottle. If the cork breaks when opening the bottle, pour the wine through a filter.
5. Protect cast iron skillet. Place a coffee filter or two in the skillet to absorb moisture and prevent rust.
—Beema, Hints and Tips Forum
See the rest of the list»
25 Ways to Use Coffee Filters
Wonderfully cheap, readily available in a couple of sizes, these little paper gems can be used in a variety of ways:
1. Cover bowls or dishes when cooking in the microwave to prevent splatter.
2. Clean windows, mirrors, chrome…they are lint-free and leave glass sparkling.
3. Protect good china by separating your good dishes with a coffee filter between each dish.
4. Filter broken cork from a wine bottle. If the cork breaks when opening the bottle, pour the wine through a filter.
5. Protect cast iron skillet. Place a coffee filter or two in the skillet to absorb moisture and prevent rust.
—Beema, Hints and Tips Forum
See the rest of the list»
Wednesday, April 6, 2011
Coach of the Year
My son's wrestling coach was recently honored as the "Coach of the Year" in our conference. To thank him for all he does, I "whipped up" a framed copy of the newspaper article, a quality picture of him at the banquet and a picture of the trophy he received.


Congratulations Coach!
Tuesday, April 5, 2011
Cooking With Cricut Blog Candy

Saturday, April 2, 2011
TinkerBell Card and Scrapbook Pages
Today is my niece's third birthday (Happy Birthday Sweetie!). The party is tomorrow, so I've been busy creating not only a card for her gift, but a two-page scrapbook layout for her mom to capture tomorrow's party. I'm going to apologize in advance for the poor photography. Winter seems to be hanging around here and with it the poor light.
She is having a TinkerBell cake for her party tomorrow, so I stuck with the theme for both her card and the layout. I was VERY tempted to go out and purchase the TinkerBell cricut cartridge, but commonsense took over. It really isn't a cartridge I would use enough to justify the cost; my daughter's too old, and I only have one niece. I happened to come across a TinkerBell scrapbooking page kit at Hobby Lobby and decided it had enough stickers and paper to create both a card and matching layouts (and I decorated a plain green gift bag) and it didn't cost me nearly as much (and it was on sale).
Supplies used:
She is having a TinkerBell cake for her party tomorrow, so I stuck with the theme for both her card and the layout. I was VERY tempted to go out and purchase the TinkerBell cricut cartridge, but commonsense took over. It really isn't a cartridge I would use enough to justify the cost; my daughter's too old, and I only have one niece. I happened to come across a TinkerBell scrapbooking page kit at Hobby Lobby and decided it had enough stickers and paper to create both a card and matching layouts (and I decorated a plain green gift bag) and it didn't cost me nearly as much (and it was on sale).
 |
| Card front (sticker says Perfectly Precious) |
 |
| Card Inside |
 |
| Envelope |
 |
| Two-page layout (white place markers for my sister-in-law to add photos) |
 |
| Close-up left page |
 |
| Close-up right page |
Supplies used:
- Paper and stickers from Disney Fairies Theme Pack by Sandylion
- TinkerBell Stickers by Sandylion
- Gypsy inkpad from Close To My Heart (Z2190)
- Lime Green Stickles by Ranger
- "3" cut from Cuttin' Up cricut cartridge cut at 4"
- All other words cut from Mickey Font cricut cartridge (who is cut at 1", look cut at .66" and negative image used)
- Layout was based on the Supporting Cast layout from the Imagine book by Jeanette Lynton
Monday, February 14, 2011
Cheesy Valentine
Okay, inspiration can come from anywhere. Looking through a cooking magazine one day, I saw an ad that sparked my creativity and knew right away what my daughter's Valentine was going to be. Here's the ad that caught my eye:
 |
| Reiman Publications, Taste of Home, Feb/March 2011, page 11 |


I attached that cute little mouse with foam tape. I used my Gypsy to hide one of the holes in the swiss cheese. I then welded a heart in the spot where the hole had been.

In addition to cheese, she loves sparkles. Stickles were a definite must-have for the hearts on the inside.

Details:
- Cheese (Create a Critter accessory and shift/accessory) cut at 4"
- Heart (Create a Critter shift/accessory) cut at 3.71"
- Mouse (Create a Critter mouse, shadow, layer 1, layer 2, layer 3) cut at 2"
- Phrase (Create a Critter phrase and shift/phrase) cut at 2"
- More Than (Cursive 101 welded together) cut at 1"
- Cheese (Create a Critter phrase placed off the mat and trimmed to delete "say") cut at 6.5" wide
- Stone Gray Staz On ink
- Magenta Stickles
- Cardstock & ribbon from scraps
Have a wonderful evening! Be back soon with another project.
Hoppy Valentine's Day
My son LOVES frogs. He has frogs sitting all around the house - bobbleheads, stone statues, big, small. What better than a frog Valentine for my "frog boy"?
Pinks and purples are not colors my teenage son loves, so I chanced looking "Christmasy" and used red and green on his Valentine.


Okay, here's the details on this card:
Hope you have a wonderful Valentine's Day!
Pinks and purples are not colors my teenage son loves, so I chanced looking "Christmasy" and used red and green on his Valentine.

I attached the frog with foam tape to give him some dimension.

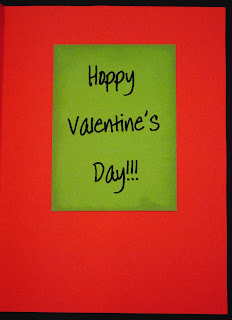
The inside was printed on the computer and then cut to fit.

Okay, here's the details on this card:
- Frog and layers (Paisley cartridge) cut at 3"
- Lilypad (Create a Critter) cut at 3"
- Cuttlebug Heart Blocks embossing folder
- Stampin' Up ribbon
- Xmas Red Stickles
- Inkssentials opaque white pen
- Lime green chalk Cat's Eye inkpad
Hope you have a wonderful Valentine's Day!
Sunday, February 13, 2011
Valentine Mail Box
Hey everyone! Here's a mailbox I made today for my niece for Valentine's Day. She's not allowed to have a lot of candy, so I stuffed it with a few pieces of candy along with some Valentine barrettes, Valentine rubber ducks, and a jingly heart necklace.

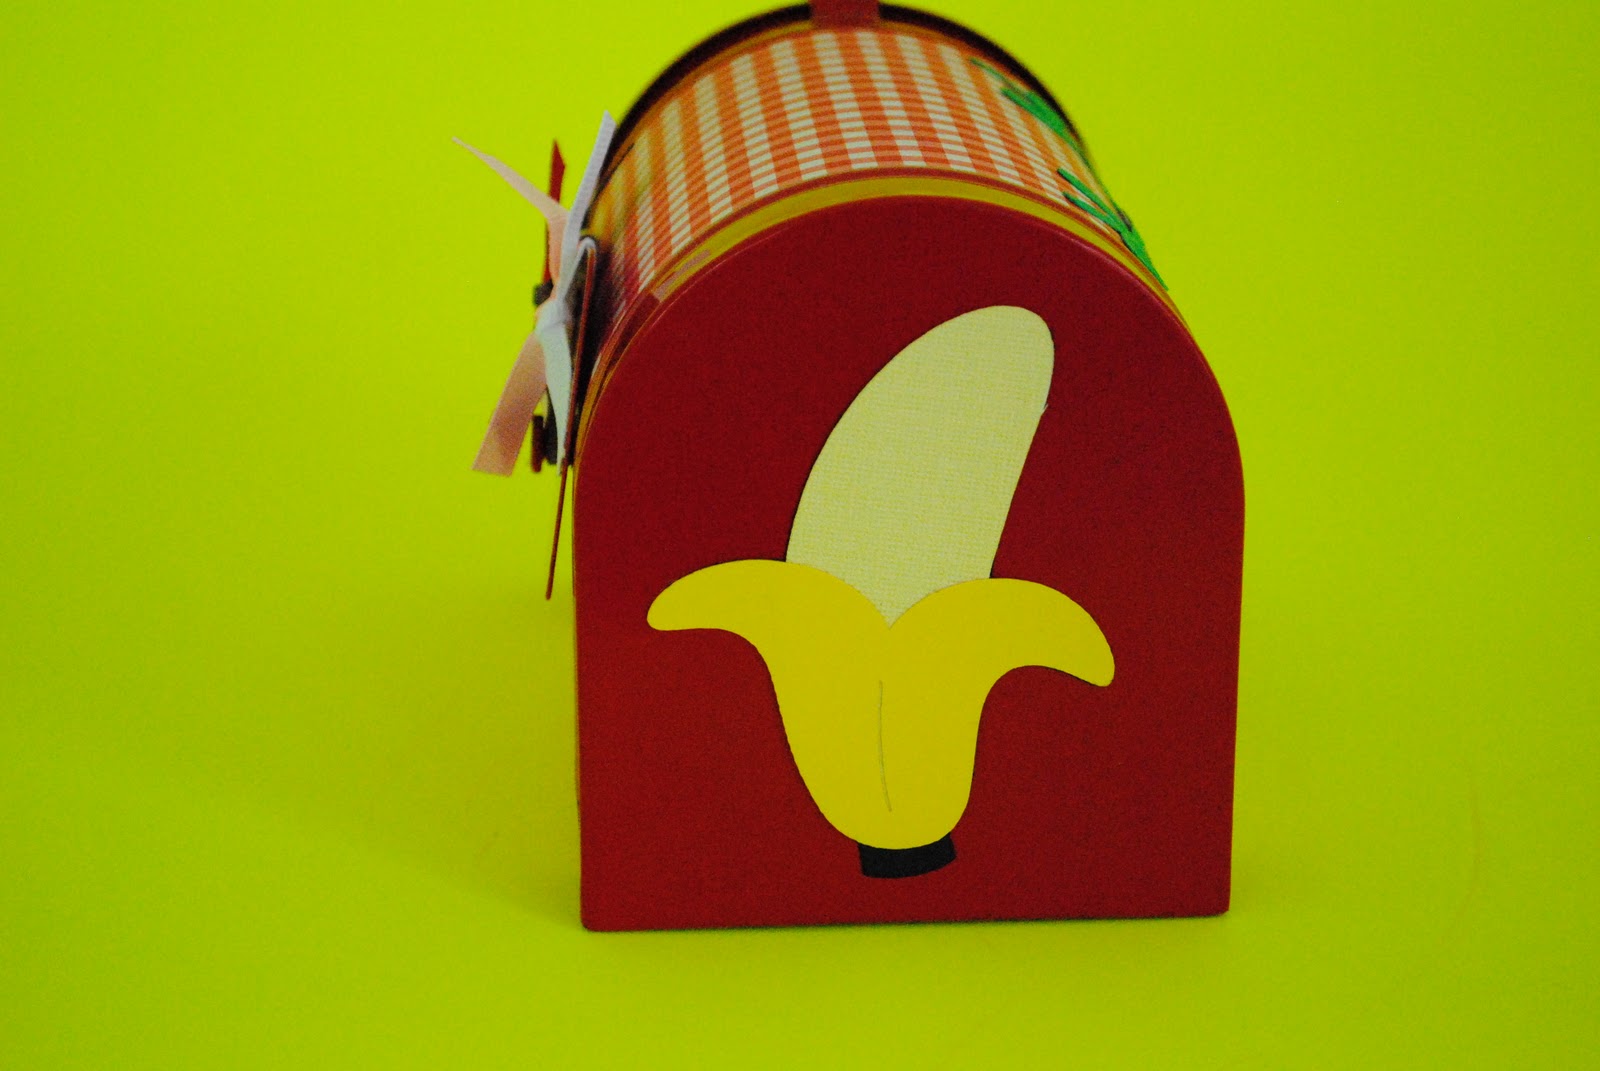
I was able to use paper from my scrap stash to complete the entire project. Everything was cut on the Cricut from the Create a Critter cartridge. The ribbon tied to the mailbox flag is from Stampin' Up.
I just love this little monkey. I wish I had some flocking at home to make him fuzzy, but it's probably just as well, since my niece is only two. 

I was able to use paper from my scrap stash to complete the entire project. Everything was cut on the Cricut from the Create a Critter cartridge. The ribbon tied to the mailbox flag is from Stampin' Up.
 |
| Front |
 |
| Back |

The cuts on the mailbox are:
- Monkey, layer 1 & layer 2 - cut at 3"
- Banana (shift monkey), layer 1 & layer 2 - cut at 3"
- Vine (shift accessory) - cut at 3.75" wide
- Balloon (shift koala), layer 1 & layer 3 - cut at 2.5"
I used my Gypsy to layout the pieces I needed to cut as well as to hide the faces that were on the balloon and bananas. Using the mat guide on the Gypsy, I was able to cut everything at once by putting different papers on the mat. Super easy project!
Hope you enjoyed. I'm off to do laundry and then back to the crafting table for a few more projects today. I'll be back to share them this week.
Subscribe to:
Posts (Atom)
LinkWithin
